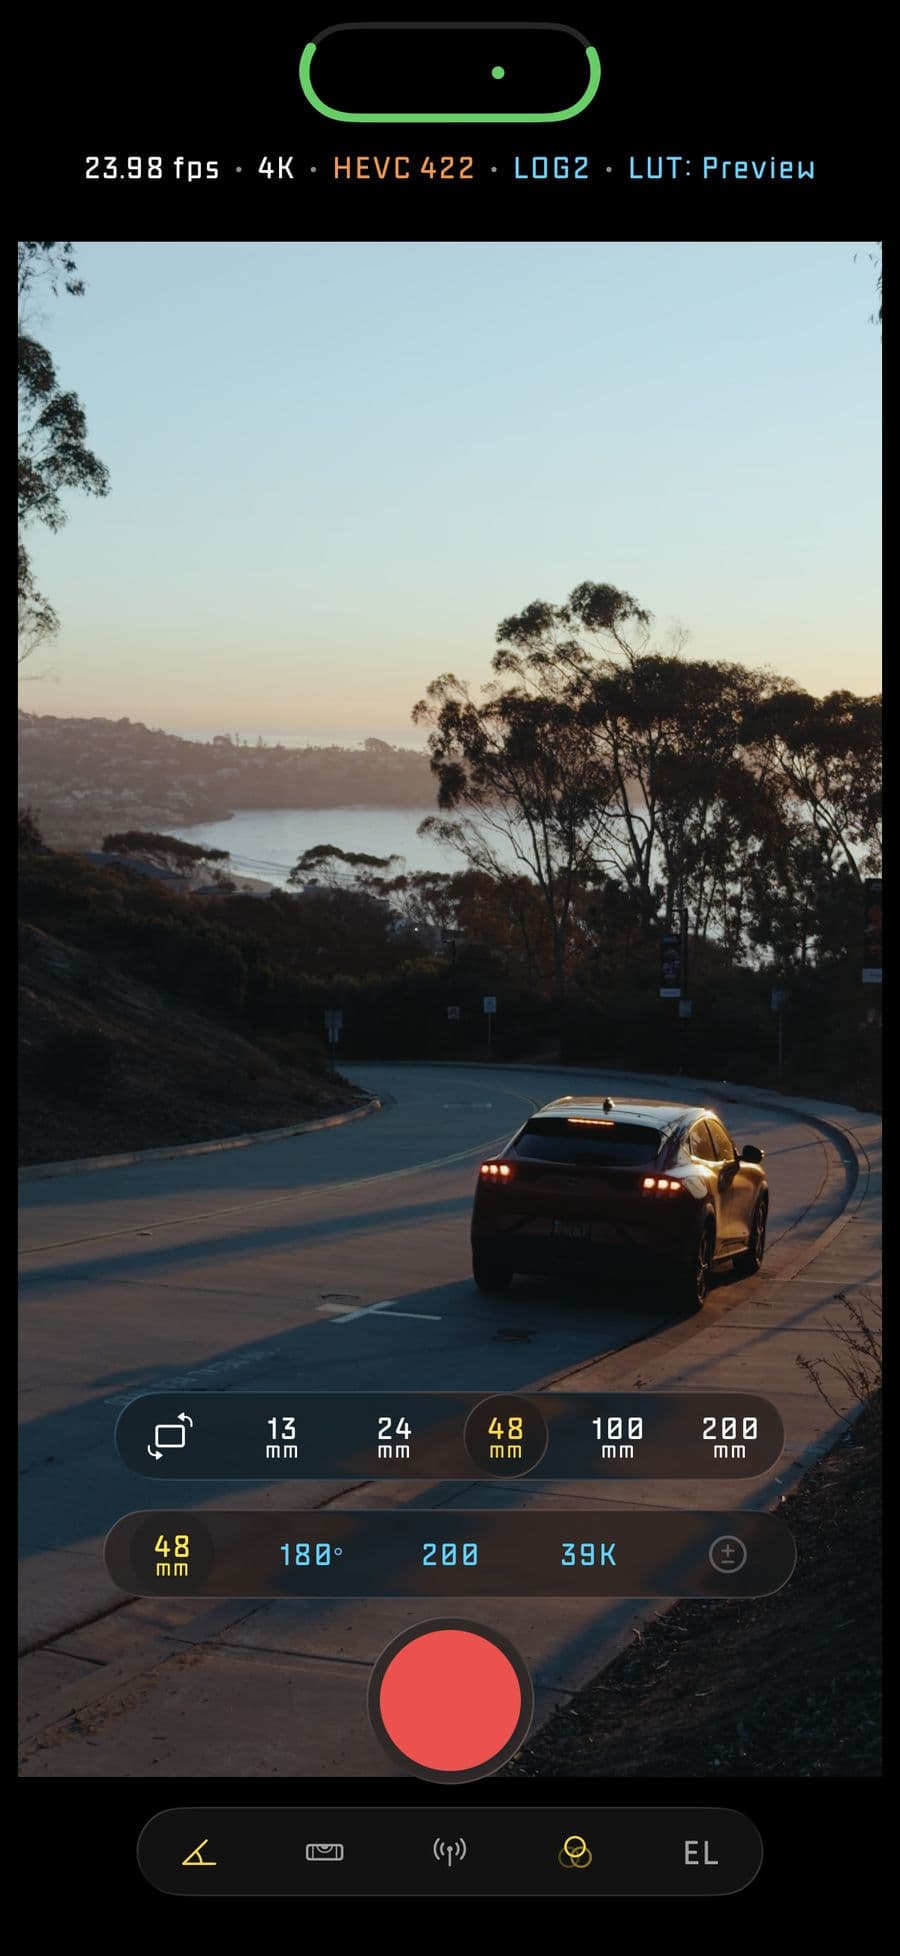
Quick Start
Quick Start
Get from a fresh install to a reliable first recording.
- Open Spencer's Camera and grant camera, microphone, and Photos permissions when prompted.
- Start with the rear main lens unless you already know you need ultra-wide, telephoto, or the front camera. Lens choice affects available formats, stabilization, and focus behavior.
- Choose Resolution, Frame Rate, Color Space, and Codec before setting exposure. These choices decide which camera format the phone can use.
- Choose your exposure mode: Auto for speed, Shutter Priority for cinematic motion with automatic ISO, or Manual for locked ISO and shutter.
- Check the audio meter, selected microphone mode, save location, storage warning state, battery, and remaining record time before a take.
- Tap Record on the iPhone, Camera Control button, Apple Watch, remote viewer, or AirPods stem controls when your device supports that trigger.
- After recording, open the library to review the clip, scrub playback, preview LUTs, export a still frame, or export video with an optional LUT applied.
Camera Settings
Camera Settings
The Camera section controls the actual capture format: resolution, color, codec, frame rate, lens behavior, shutter priority defaults, and the recording light.
- Resolution controls the recorded dimensions. Common options include HD, 4K UHD, Open Gate, and RAW-specific modes when the active iPhone/lens supports them.
- Color Space controls the image pipeline. Rec. 709 is the safest SDR choice, P3 Wide Color offers a wider SDR gamut, HLG HDR and Dolby Vision target HDR workflows, and Apple Log or Apple Log 2 are intended for grading.
- Codec controls compression and storage size. H.264 is broadly compatible, HEVC is efficient, HEVC 10-bit supports higher-quality HDR/log workflows, ProRes variants create larger editing-friendly files, and ProRes RAW/RAW HQ are device-limited high-end capture modes.
- Frame Rate controls motion cadence and available shutter speeds. 24 fps is the normal cinema baseline, 30 fps suits general video, 60 fps is smoother, and 120/240 fps are for slow motion when available.
- Default Front Camera chooses which front lens behavior the app starts with: Standard, Ultra-Wide, or Landscape mode where supported.
- Main Lens Cycling controls whether the main-lens control cycles through focal-length-style presets such as 24 mm, 28 mm, and 35 mm instead of treating the main camera as one fixed choice.
- SP Mode Shutter Angle sets the default angle used by Shutter Priority. 180 degrees is the normal motion-cadence default, smaller angles look crisper, and larger angles add more motion blur.
- Recording Light uses the device flashlight as a visible recording indicator on supported rear cameras. Adjust intensity in the Recording Light settings; it is not available on the front camera.
- If a format disappears, check the active lens, frame rate, color space, codec, and iPhone model. Spencer's Camera filters impossible combinations instead of showing settings the phone cannot record.
Exposure Controls
Exposure Controls
Use the exposure mode that matches how you think on set.
- Auto lets the camera react to light changes. Use it for fast-moving work, changing environments, or when getting the shot matters more than locking values.
- Shutter Priority locks the frame rate and shutter angle while ISO floats. This preserves motion cadence without forcing you to ride ISO manually.
- Manual exposes ISO and shutter speed independently. Use it for locked lighting, controlled sets, repeatable tests, and shots where exposure must not drift.
- EV Bias trims Auto or Shutter Priority exposure brighter or darker without leaving that mode. Use it when the camera is generally right but consistently too hot or too dark.
- White Balance controls color temperature and tint. Lock it when you need a consistent color baseline across a take or scene.
- Focus can be adjusted by tapping the preview, using focus controls, or relying on Face Priority Focus when faces should drive autofocus.
- Exposure lock during recording freezes exposure behavior once a take begins. Turn it on when a mid-take brightness shift would be distracting.
- Aperture ISO Compensation helps preserve exposure when switching lenses with different apertures by adjusting ISO to compensate.
- ND Filter Guidance warns when the scene is too bright for the shutter angle you want. Use real ND filtration to preserve motion blur in daylight instead of raising shutter speed.
Recording Settings
Recording Settings
The Recording section controls stability, locks, focus behavior, UI behavior during takes, and timecode.
- Video Stabilization reduces shake for handheld work. Disable it when using a tripod, locked-off rig, or a format/lens where stabilization changes framing in an unwanted way.
- Lock Exposure During Recording prevents auto or shutter-priority exposure from changing mid-take. This is useful for interviews, narrative shots, and controlled lighting.
- Aperture ISO Compensation tries to keep exposure consistent when switching between lenses with different apertures.
- Lock White Balance During Recording prevents color temperature and tint from drifting during a clip.
- Face Priority Focus tells the app to prioritize detected faces for autofocus when the scene has people in it.
- Auto-Hide Controls While Recording removes controls from the preview during a take so the monitor surface stays cleaner.
- Timecode settings control how elapsed or clock-based time is represented. Use timecode when matching shots, reviewing takes, or handing files into a more formal post workflow.
- If recording will not start, check storage, active permissions, current codec/resolution support, active audio route, and whether the selected format is supported by the current lens.
Formats, Codecs, and Color
Formats, Codecs, and Color
Choose the codec and color pipeline before the moment matters.
- Use H.264 when compatibility matters most and you want files that almost every app can open.
- Use HEVC when you want smaller files with strong quality. Use HEVC 10-bit for higher-quality HDR or log-friendly workflows where supported.
- Use Dolby Vision or HLG HDR when the clip is intended for HDR display or an HDR delivery path.
- Use Apple Log or Apple Log 2 when you plan to grade the footage. Pair it with LUT Preview for monitoring so the on-set image is easier to judge.
- Use ProRes when you want editing-friendly files and have enough storage for higher data rates.
- Use ProRes RAW or ProRes RAW HQ only on supported iPhone 17 Pro hardware and supported lens/format combinations. The app may switch to a RAW-compatible resolution automatically.
- Use Open Gate when you want extra framing room for reframing, stabilization, vertical crops, or multiple aspect-ratio deliverables.
- When Spencer's Camera changes one setting after you choose another, it is resolving a format conflict. For example, RAW may require a RAW sensor mode, and some HDR choices require a compatible codec.
Color Grading and LUTs
Color Grading and LUTs
Manage LUTs, preview looks while shooting, and decide when to bake color into files.
- Open Manage LUTs to import .cube LUT files. Keep LUT names descriptive so you can recognize the look quickly on set.
- Use LUT Preview to monitor a graded image while recording. This changes the preview, not necessarily the recorded source.
- Keep Apple Log or Apple Log 2 active when you want maximum flexibility for grading later.
- Use Bake in LUT only when you intentionally want the delivered/exported file to include the look permanently.
- Use the LUT carousel on the camera surface to switch between None and imported LUTs quickly.
- In the video library, use LUT preview to inspect recorded clips with a look applied before deciding whether to export.
- If a LUT appears wrong, confirm it was designed for the color space you captured. A Rec. 709 LUT and an Apple Log LUT are not interchangeable.
- Use EL Zone when judging exposure placement matters more than seeing a normal image. It maps luminance into exposure zones so clipped highlights, skin placement, and shadows are easier to evaluate.
Audio Settings
Audio Settings
Choose channels, microphone direction, meters, and supported iOS 26 input controls before recording.
- Audio Channels chooses the recorded channel layout: Mono, Stereo, or Spatial where supported.
- Spatial audio uses device and OS support for immersive capture. When Spatial is active, the microphone mode may show Auto because the spatial path controls the mic configuration.
- Microphone Mode chooses microphone direction when available, such as automatic, front-facing, or back-facing pickup.
- Audio Level Meter shows live input levels on the camera preview. Keep it enabled when sound matters so you can catch silence, clipping, or a disconnected mic before recording.
- Audio Input Selector is available on supported iOS versions and can be assigned to a function button for fast input changes.
- External microphones and AirPods may appear depending on the active audio route. Reconnect or reselect the input if levels disappear.
- Use AirPods stem controls for record control on supported setups, but confirm the app shows the expected recording state before relying on it for an important take.
- For spatial audio, test playback on AirPods or a spatial-capable playback setup before treating the capture as final.
Storage Settings
Storage Settings
Decide where recordings go and how to handle large codecs safely.
- Save Location chooses Photos Library or External Storage. Photos Library is simplest; External Storage is better for large ProRes or RAW takes.
- External Storage opens a folder picker for a USB-C drive or Files location. The app stores access so future recordings can go directly there when the drive is available.
- If external storage is disconnected or inaccessible, the app may fall back to Photos Library or ask you to reconnect/select a valid path.
- Higher frame rates, Open Gate, ProRes, and ProRes RAW consume storage quickly. Check free space before long takes.
- Use the storage warning as a hard preflight signal. Free space, lower the codec, lower the frame rate, or switch destination before starting another take.
- For post workflows, record to external storage when you want to move files directly to a Mac, editor, or backup drive without exporting from Photos first.
Remote Camera
Remote Camera
Control a nearby iPhone camera from another device without using a cloud relay.
- Open Remote Camera on the recording iPhone and the controller/viewer device.
- Pair nearby devices through the peer-to-peer flow. Keep Bluetooth, Wi-Fi, and local network permissions available when iOS asks.
- Use the remote viewer to monitor preview, LUT state, audio meters, recording state, exposure, white balance, ISO, shutter, EV bias, and supported settings.
- Remote Settings lets the controller adjust the connected camera without touching the recording phone.
- Remote Camera Always Broadcast keeps the camera more discoverable for remote workflows when enabled.
- Rename or identify remote devices if you work with multiple iPhones so the correct camera is obvious during pairing.
- Keep both devices awake, nearby, and on a stable local connection. Avoid switching networks or backgrounding either device during critical takes.
- Use Remote Camera for solo operation, mounted phones, gimbals, vehicle rigs, overhead shots, or any placement where touching the camera would disturb the shot.
DockKit
DockKit
Use compatible motorized mounts for tracking and remote movement.
- Accessory Dial chooses what a compatible DockKit mount dial controls, such as zoom or exposure behavior.
- Joystick Sensitivity controls how responsive the virtual joystick feels from a remote controller. Lower values are smoother; higher values move faster.
- Mount Tracking chooses between Apple system tracking and manual/joystick-style control when the connected mount supports it.
- Tap-to-track and custom tracking controls may be limited by iOS behavior and device support. Treat experimental tracking options as nonessential until verified with your mount.
- For precise production moves, test the mount, lens, stabilization, and remote control before the actual take.
Apple Watch
Apple Watch
Use the watch when the phone is mounted or hard to reach.
- Install the Apple Watch companion app from the App Store install flow.
- Open the watch app after the iPhone camera session is active.
- Use the watch to start or stop recording and control supported camera functions from your wrist.
- Check the recording indicator, elapsed time, and synced state before relying on the watch during a take.
- If the watch does not reflect the phone state, reopen the watch app, keep the phone app foregrounded, and confirm Bluetooth/Wi-Fi connectivity.
Display and Visual Overlays
Display and Visual Overlays
Build a monitoring view that helps composition and exposure without hiding the shot.
- Lock Brightness keeps the screen at a fixed brightness level. Use it when display brightness changes would make exposure judgment inconsistent.
- Dim Screen During Recording lowers screen brightness after recording starts to save battery and reduce distraction.
- Screen dimming intensity can range from partial dimming to Incognito behavior where the UI is effectively blacked out.
- Lock Orientation keeps the UI and capture orientation stable instead of responding to device rotation.
- Recording Edge Ring shows a red border while recording so the state is visible even when controls are hidden.
- Level Indicator shows horizon tilt. Use Level Haptic Feedback when you want a tactile cue as the phone reaches level.
- Rule of Thirds Grid adds composition lines for framing handheld, documentary, and general coverage.
- Aspect Ratio Guides show framing masks or guides for deliverables such as 2:1 or 2.39:1.
- Center Marker helps place subjects or align symmetrical shots.
- Overlay opacity and thickness controls let you tune grid lines, level indicators, aspect guides, and center markers so they are visible without dominating the preview.
- EL Zone can be shown as an exposure visualization overlay when you need a zone-based read of the image.
- ND Filter Guidance appears when preserving shutter angle likely requires neutral density filtration.
External Display
External Display
Send either a mirrored screen or a cleaner camera feed to an external monitor.
- Output Mode controls the external display behavior. Mirror Display mirrors the iPhone screen; Clean Feed sends a camera-focused output.
- Clean Feed LUT Preview applies the selected LUT to the external display feed for monitoring.
- Clean Feed Recording Border shows a red border on the external display when recording.
- Clean Feed Timecode Display shows elapsed recording time on the external display.
- Clean Feed Level Indicator shows the level overlay on the external display.
- Clean Feed Rule of Thirds shows the grid on the external display.
- Clean Feed Aspect Ratio Guides shows framing guides on the external display.
- Clean Feed Match Device Orientation rotates the external preview to match the phone orientation.
- Use Clean Feed when clients, focus pullers, or collaborators need a readable monitor without the full phone control surface.
Shortcuts, Function Buttons, and Presets
Shortcuts, Function Buttons, and Presets
Customize the controls that stay closest to your shooting hand.
- Shortcut Launcher Favorites chooses up to 9 ordered actions for the launcher menu. Put the controls you use mid-shoot at the top.
- Function Buttons F1 through F5 can be assigned to actions such as LUT preview, zoom, EV bias, screen dimming, guides, exposure tools, audio controls, and presets.
- Some function-button actions are locked while recording or hidden when the current iPhone, lens, codec, or mode cannot support them.
- Use the visible function buttons for one-tap controls and the launcher for actions you still need quickly but not constantly.
- P1, P2, and P3 Presets store camera setups so you can jump between common configurations.
- Presets are useful for recurring setups such as 4K 24 Apple Log with LUT preview, slow-motion B-roll, or a lightweight HEVC social setup.
- After changing presets or button assignments, do one short test recording to confirm the saved state matches the workflow you expect.
Library, Playback, and Export
Library, Playback, and Export
Review takes, inspect audio/color state, and export stills or graded video.
- Open the video library to review recordings captured by the app.
- Use the carousel to browse clips. Load more clips when needed without leaving the library.
- Tap a clip for playback, scrubbing, and review. iCloud-backed items may need time to download before playback starts.
- Use Library LUT Preview to inspect a selected clip with the active LUT applied.
- Export Still Frame when you need a frame grab from the current playback position.
- Export Video when you want to render a copy, optionally with the selected LUT applied.
- Spatial audio indicators help identify channel layout during playback where the metadata is available.
- Large LUT exports can continue with progress UI and Live Activity support. Avoid force-quitting if an export is in progress.
Tools, About, and Support
Tools, About, and Support
Use diagnostic and support tools when something needs investigation.
- Export Diagnostic Logs creates a support bundle for troubleshooting. Choose the issue type and time range that match what happened.
- Hardware Capabilities may appear in development builds and shows what the current device reports for formats and capture support.
- Email Feedback opens a support email path for bug reports, questions, or feature requests.
- Rate in App Store opens the App Store rating flow.
- Join Beta Program points interested users toward TestFlight when beta access is available.
- Privacy Policy and Terms of Use open the app's legal documents.
- Thank You shows supporter acknowledgements and app-specific notes.
- When reporting a reproducible issue, include the device model, iOS version, lens, resolution, frame rate, codec, color space, audio mode, save location, and diagnostic logs.
Troubleshooting
Troubleshooting
Most capture issues come from unsupported device modes, permissions, storage, or connected accessories.
- If a format is missing, confirm the iPhone model, lens, active camera, frame rate, codec, color space, and iOS version support it.
- If ProRes RAW is missing, confirm you are on supported iPhone 17 Pro hardware and using a RAW-compatible resolution/lens path.
- If Apple Log or Apple Log 2 is missing, confirm the active device, iOS version, codec, and frame rate support that color space.
- If audio is not visible, check microphone permission, audio meter state, Bluetooth route, external mic connection, channel mode, and microphone mode.
- If remote control feels unstable, keep devices nearby, reopen the peer-to-peer session, and avoid changing Wi-Fi or backgrounding either device mid-session.
- If the Apple Watch does not update, keep the iPhone app open, reopen the watch app, and confirm the phone is reachable.
- If an external monitor looks wrong, switch between Mirror Display and Clean Feed, then review the Clean Feed overlay toggles.
- If storage warnings appear, free space, reconnect external storage, lower the codec/frame rate, or switch to Photos Library before recording.
- If the preview and exported color do not match, confirm whether LUT Preview, Bake in LUT, Library LUT Preview, and export LUT options are enabled.
- If the UI is hard to see during recording, review brightness lock, screen dimming, incognito dimming, auto-hide controls, and overlay opacity.
- Use Export Diagnostic Logs from Settings when you need to send a reproducible issue report.